| Table of Contents |
|---|
Prerequisites
Ensure that the following are installed on your development machine. This walkthrough will use Unity 2020.3.21f1
Unity Hub
Unity 2020.3.21f1
Use this link to download via Unity Hub: unityhub://2020.3.21f1/6dd1c08eedfa
The ability to build for both PC and Android from Unity
Unity Hub will provide ways for you to download any missing components by going to the Installs section
Click the three dots and select Add Modules

Create a Unity Project
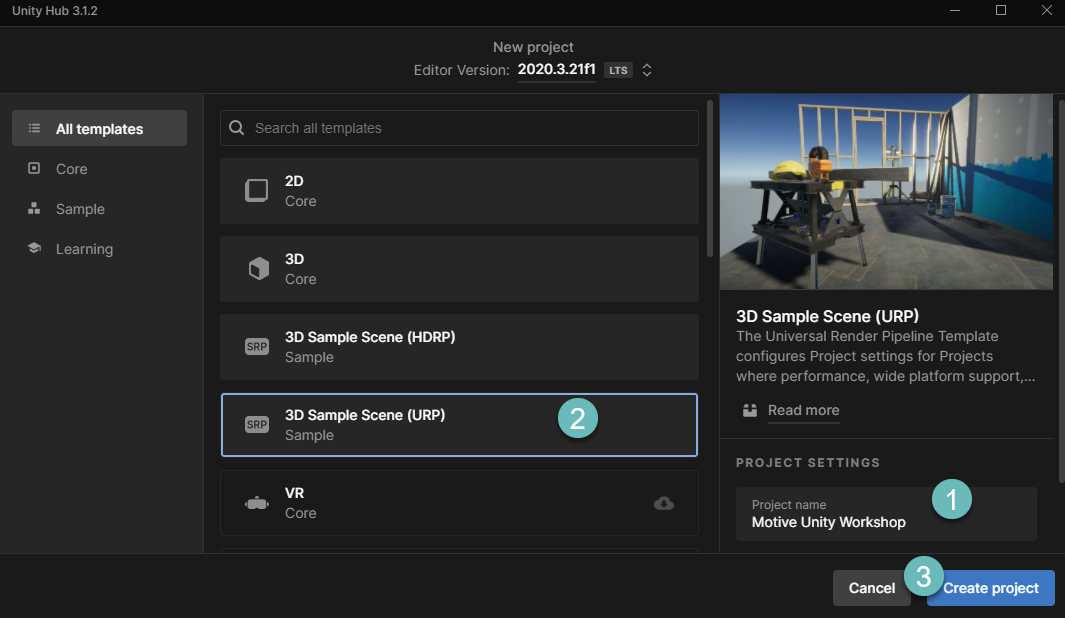
In Unity Hub → Projects click the New Project.

Give the Project a name
Select Universal Render Pipeline
Click the Create Project button
Import and Configure the Motive Unity SDK
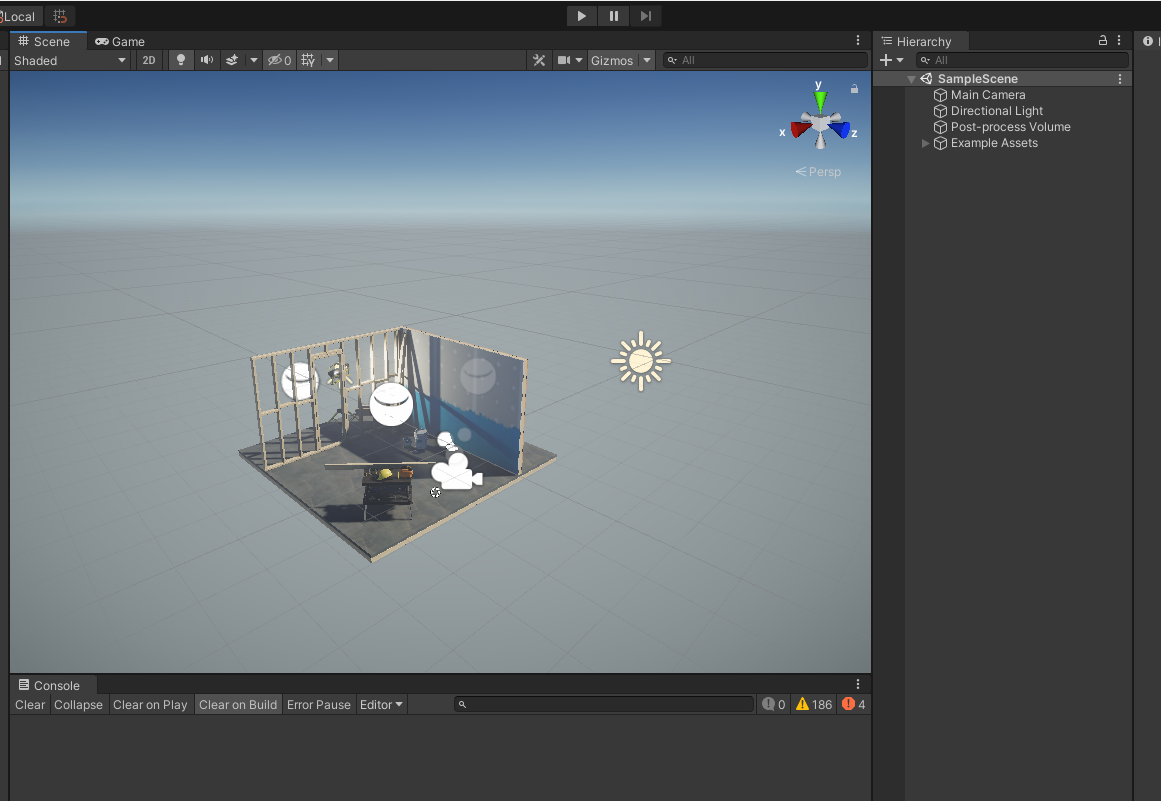
The new Unity project will look like this:
Install Dependencies
The Motive SDK uses the following Unity packages. Install these packages using Package Manager:
XR Interaction Toolkit
Version 2.0.1
| Info |
|---|
After installing, you may be asked to restart Unity. If so, allow it to restart. |
XR Interaction Subsystems
Version 1.0.1
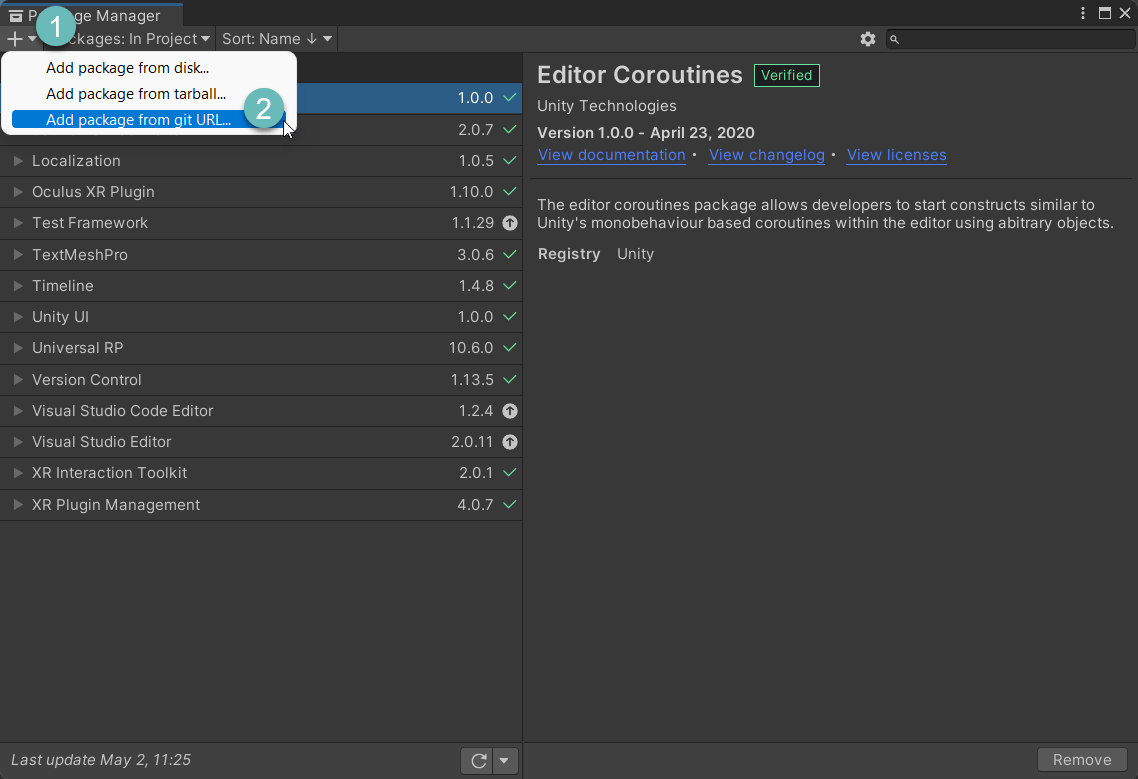
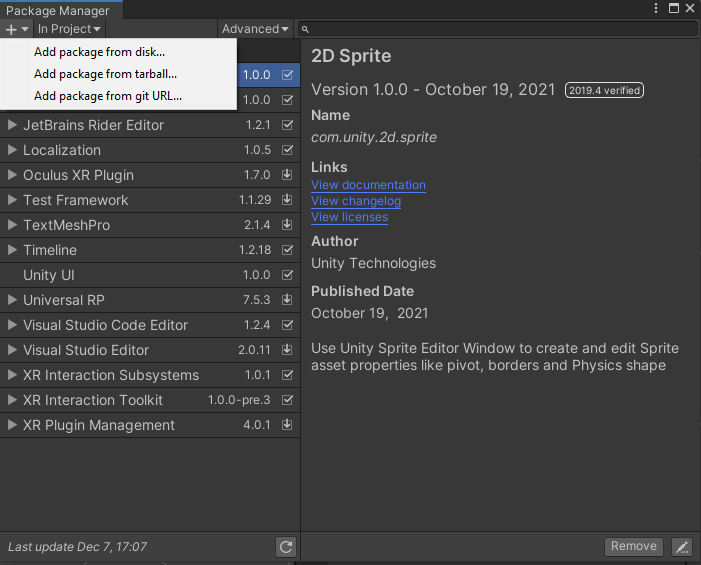
To install in Unity versions pre 2021, select Add package from git URL and enter com.unity.xr.interactionsubsystems as shown below then click Add.
XR Plugin Management
Version 4.0.7
Editor Coroutines
Version 1.0.0
If you get the “API Update Required” pop-up, select “I Made a Backup. Go Ahead!”

Localization
Version 1.0.5
To install in Unity versions pre 2021, select Add package from git URL and enter com.unity.localization@1.0 as shown below, then click Add.
Add the SDK
Add the Motive SDK to the project. (Contact hello@motive.io for more information about getting access to the SDK.)
You have two options to do this:
Download the Motive SDK from GitHub as a zip file
Unzip the file
Rename it Motive (This should contain three folders, Editor, Runtime, Tests and a few files)
Move that folder into the Assets folder of your project using File Explorer
If using source control for your project, set up a submodule in your repository. Point the submodule at the Motive SDK repo and pull the main branch. The Motive SDK needs to be in the Assets folder of the Unity project.
Once the it has been added, the Project Window in Unity should look similar to this:
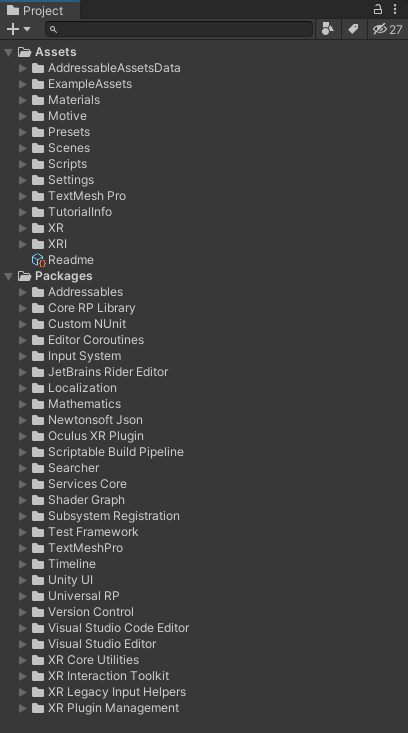
Note that your Motive folder may be in either Assets or Packages depending on how it was installed.
Configuration
Player Settings
In the menu, open Edit → Project Settings…
Select Player
Expand ‘Other Settings’
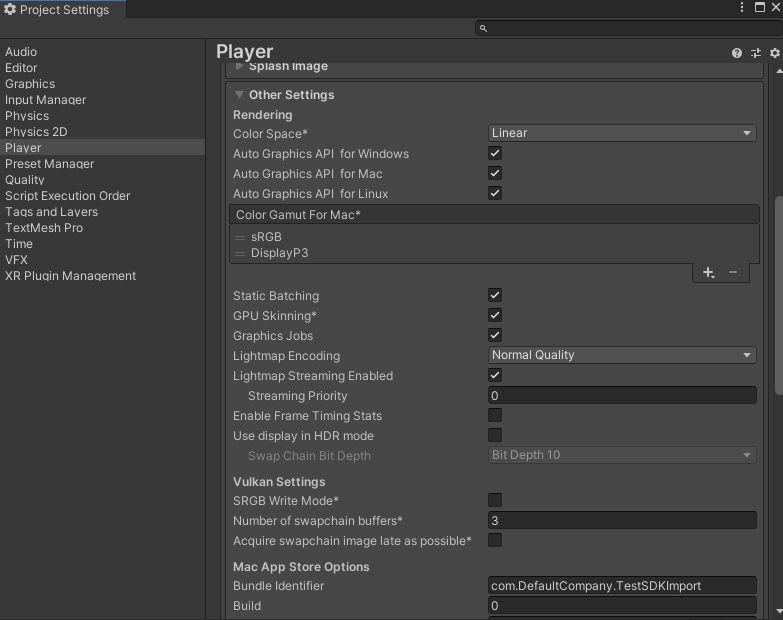
Set the following values for both PC/Standalone and Android:
Scripting Backend - IL2CPP
Api Compatibility Level - .NET 4.x
Allow ‘unsafe’ code: true
Active Input Handling: Input System Package (New)
Save the the Unity Project. Note that you may want to do additional configuration based on platform. For example, for Oculus builds we recommend that you follow these guidelines:
https://developer.oculus.com/documentation/unity/unity-conf-settings/
That’s it! The Motive SDK is now installed and ready to use.
Localization
Choose “Assets/Motive/Localization/Localization Settings” for Localization Settings. The window should look like this once chosen:
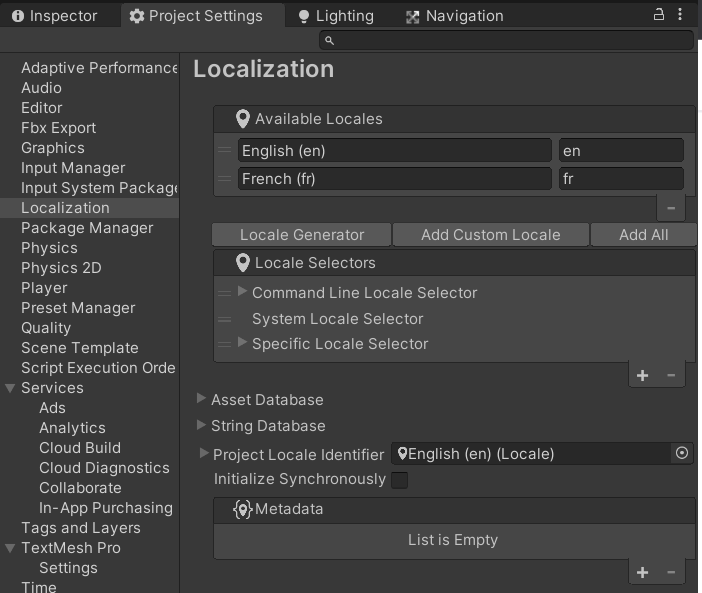
If you run into Localization errors while running, you may need to re-import the Motive/Localization folder in the Unity Editor. Simply right-click the folder and select “reimport.”
Build the Localization Addressables
From the main menu
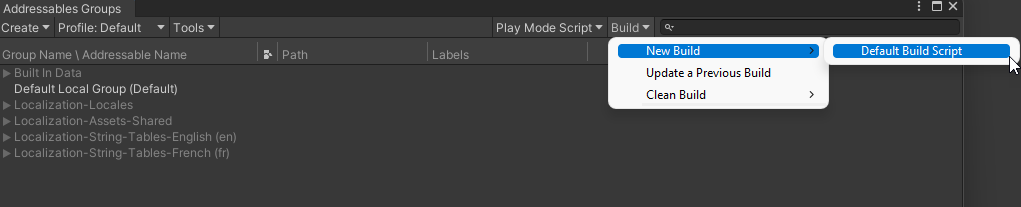
Select: Window → Asset Management → Addressables → Groups
The Addressables Group window will appear
Select: Build → New Build → Default Build Script
Once it completes, close the window
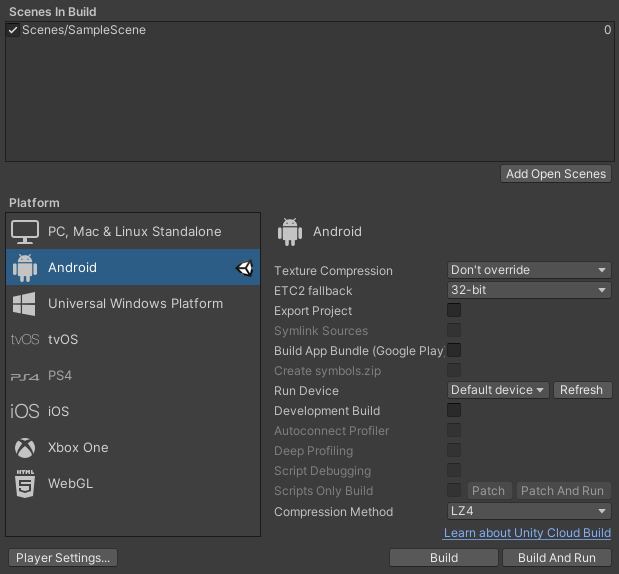
Build Settings
Using (Control + Shift + B) open up your projects Build Settings. Next, select the Android tab and if it is not already toggled on select the Switch Platform button. If it is already selected your window should appear as so. With the Switch Platform button now saying Build at the bottom right.
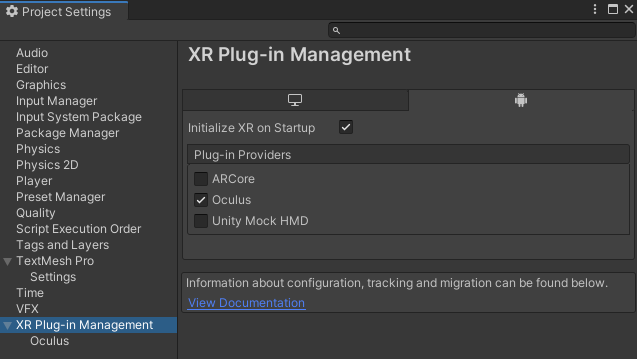
XR Plug-in Management
Select Edit > Project Settings > XR Plug-in Management and make sure your Plug-in Provider is set to Oculus.
| Info |
|---|
Make sure to do this on both the Android and PC tabs. |
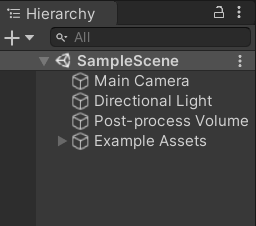
Hierarchy Setup
The Hierarchy window in Unity will look like to start
Organize Existing Components
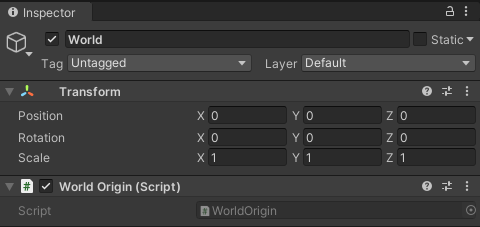
Right click in the Hierarchy window and select Create Empty from the menu
Select the new GameObject and rename it to World
Attach the “World Origin” script.
Select the following and drag them onto the World object to make them all children
Directional Light
Post-process Volume
Example Assets
Delete Main Camera
Set World transform Position values to (0,0,0)
Set up Layers and Physics
The Motive SDK expects Unity to be configured with specific layers and physics for those layers. These are the default settings--if these collide with other layer requirements, you will need to update the SDK prefabs to point the the correct layer.
Add Layers
In the top bar of Unity, click Layers > Edit Layers.
In the “Tags & Layers” view, expand Layers. Add the additional layers as shown here:
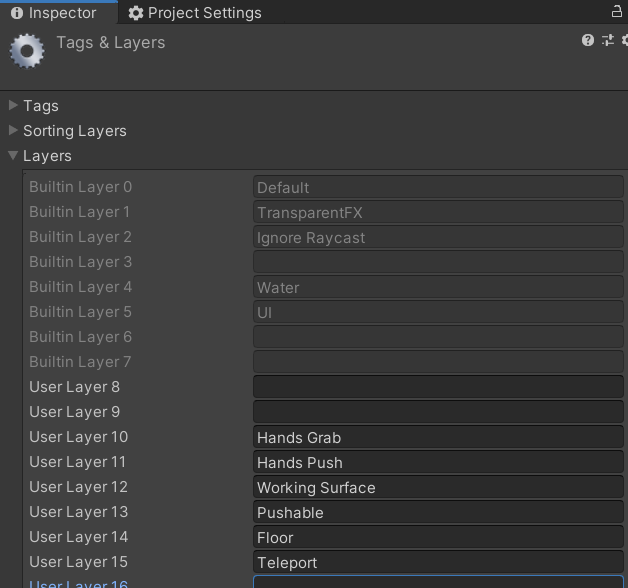
10 - Hands Grab
11 - Hands Push
12 - Working Surface
13 - Pushable
14 - Floor
15 - Teleport
Configure Collision Matrix
Edit > Project Settings
Physics
Configure the Layer Collision Matrix so that it looks like this:
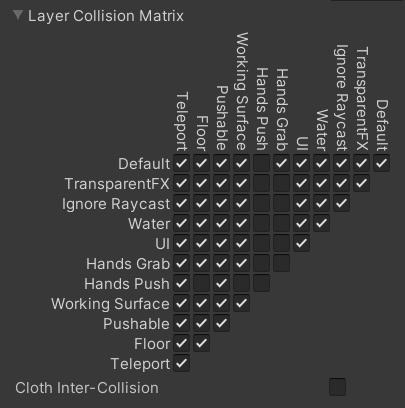
Advanced: you may be able to further refine this, the crucial piece is to not create unnecessary collisions between the Push colliders on the hands and other elements in the scene. Pushing is not currently enabled in the latest SDK.
Add Motive Prefabs
See Motive Prefabs for more information about each of these prefabs.
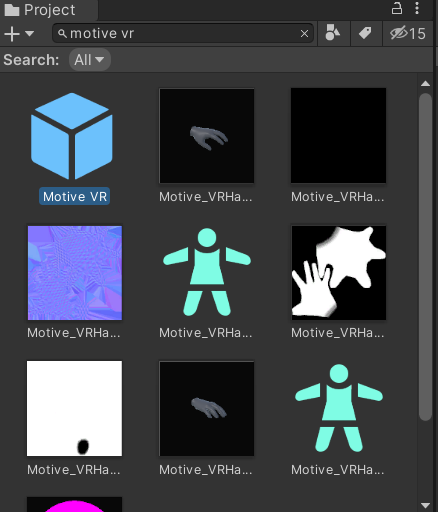
Motive VR
In the Project window, search for Motive VR. Drag the prefab into the Hierarchy window so it is a child of SampleScene. Note that if you have installed the SDK as a package, you will need to ensure to set “Search: All”
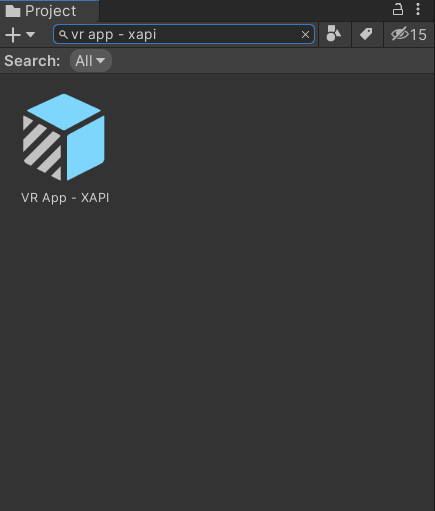
VR App - XAPI
In the Project window, search for “VR App - XAPI”. Drag the prefab into the Hierarchy window so it is a child of SampleScene.
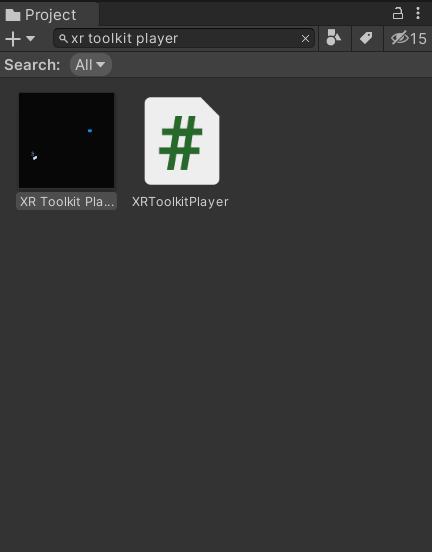
XR Toolkit Player
In the Project window, search for XR Toolkit Player. Drag the XR Toolkit Player prefab into the Hierarchy window so it is a child of World.
| Info |
|---|
Note that different platforms will use different Players:
|
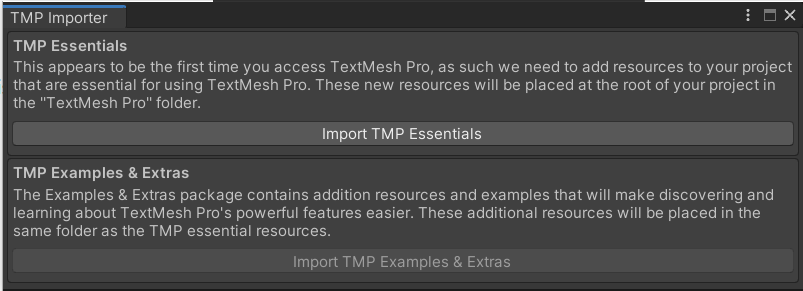
At this point you may be prompted to install Text Mesh Pro. Click “Import TMP Essentials.”
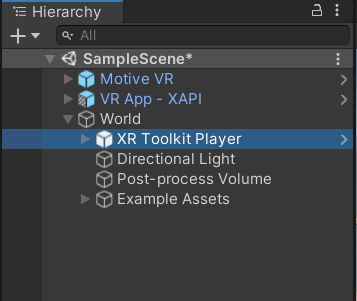
Your Hierarchy should now look like this:
Position the Player Prefab in the Scene
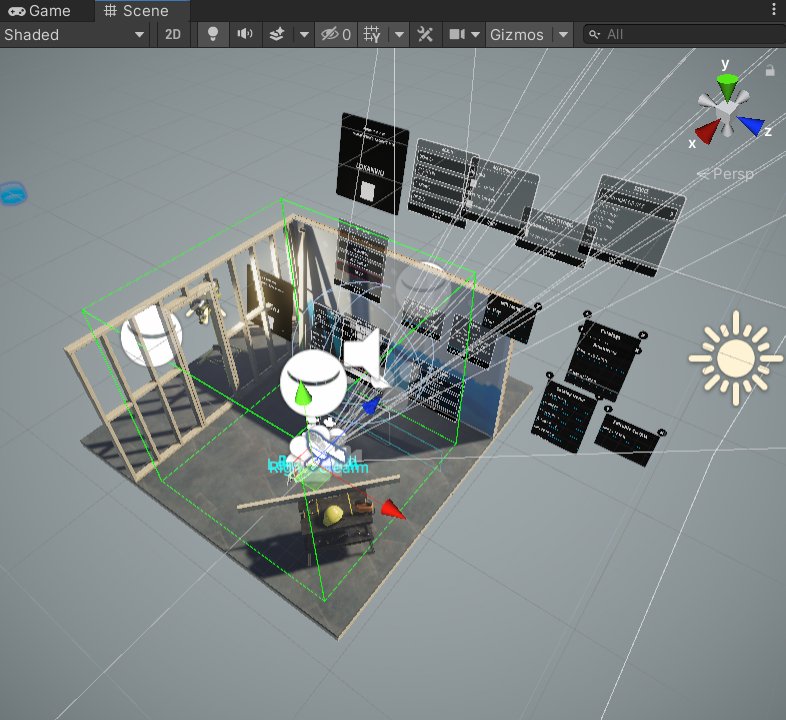
The scene will look something like this:
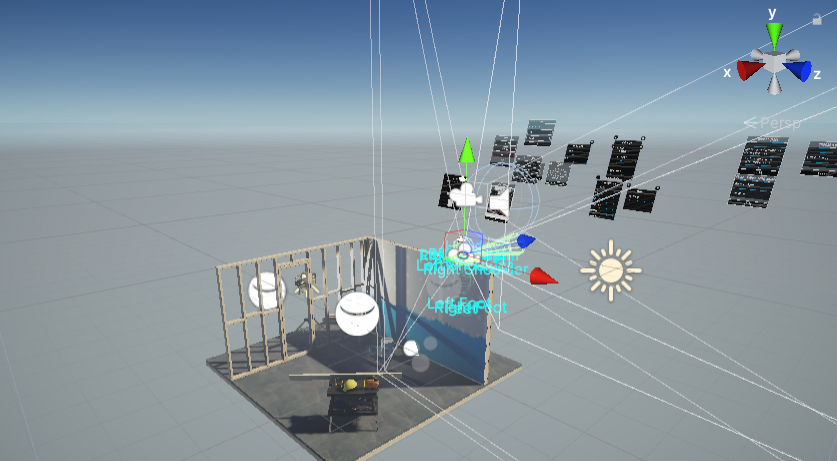
Select the XR Toolkit Player prefab and position the prefab where you want the user to start:
You should now be able to run the scene in the Unity editor. You may need to take additional setup steps depending on your hardware. For example, see Configuring Oculus XR Plugin to set up the XR Plugin system to use Oculus.
Connect the Unity Scene to the Motive Platform
Set the App Config
An App Config contains the information to connect the scene to the Motive Platform. We provide a few default App Configs. In most cases, these will work for this exercise.
In the Hierarchy, expand VR App - XAPI
Select Setup
Click on the value in the App Config field
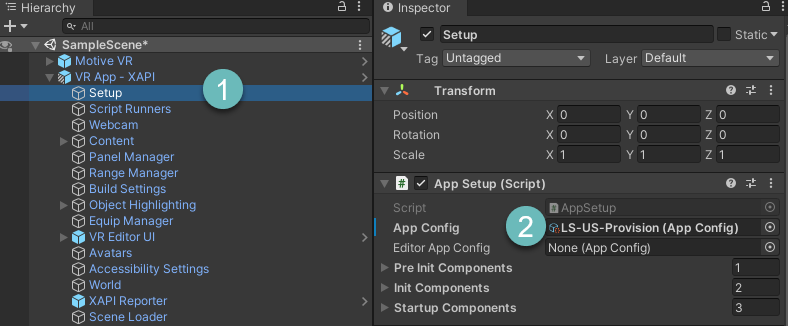
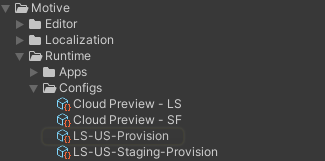
This will highlight the App Config in the Project tab. These are the default App Configs.
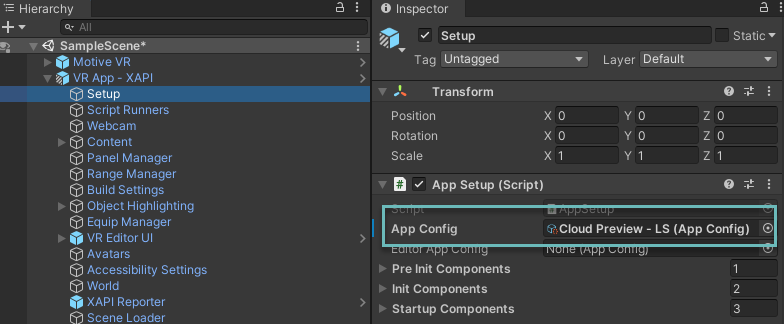
Assign the Cloud Preview - LS App Config to the App Config field in the App Setup Script. This will point the Unity scene at Motive Launch Server. It also provides an option to connect to Storyflow directly.
Test the Connection
At this point, you can run the scene and put on your Oculus. You should see this screen. If so, it is configured correctly.
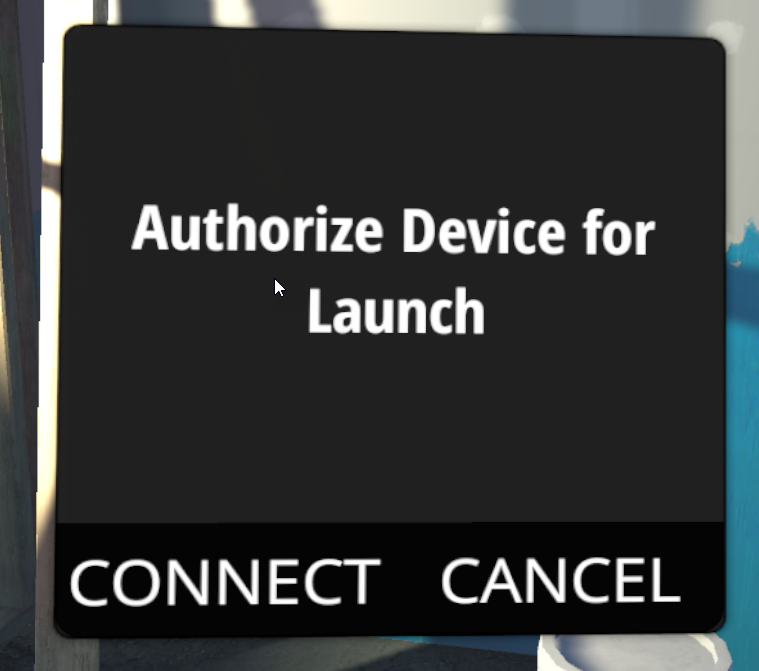
At this point, you can stop the simulation and return to Unity.
Create an App Config (optional)
| Info |
|---|
This step is not required. You can use one of the default App Configs described in the section above. This is purely informational in case you are curious about how to make your own App Config. |
If you do not want to use the default App Configs, you can create your own. In the Project section, create a new folder called AppConfigs in the Assets folder.
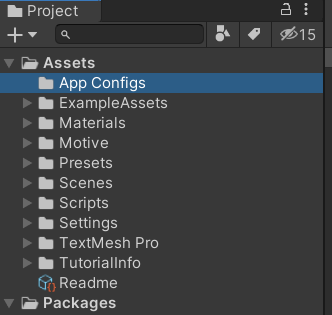
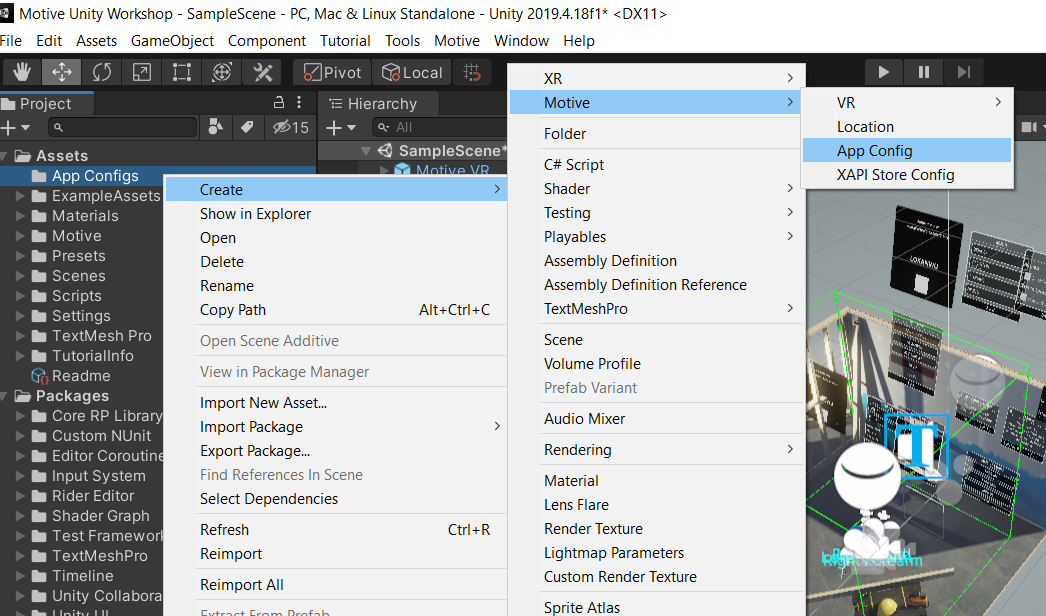
Add a new App Config to the folder. Right click on the folder and select Create->Motive->App Config
Set the App Config Values
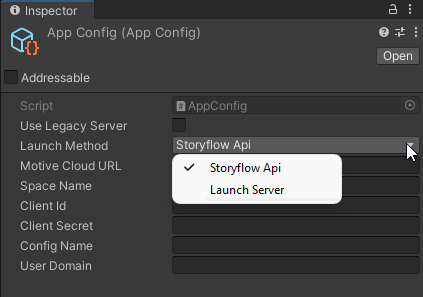
Once it has been created, select it to view the properties in the Inspector.
Select a Launch Method. Either Storyflow Api or Launch Server.
Enter the Motive Cloud URL. This is the url of the Motive platform instance.
Ensure there is no backslash at the end of the url.
Once the values have been added, it can be assigned in the same manner described in the earlier step with the default App Configs.
Configure Existing Models in the Demo Scene
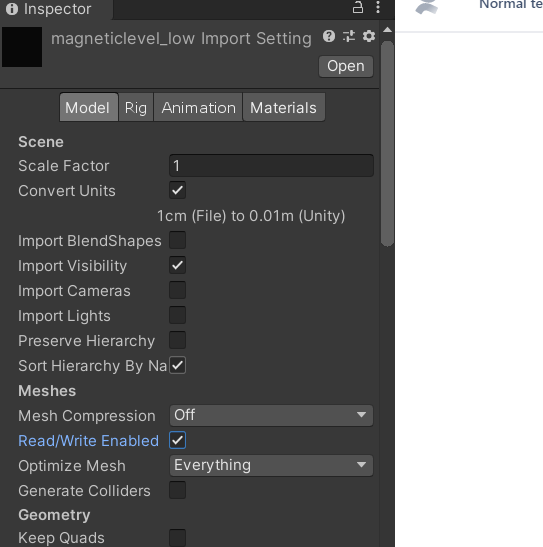
All Existing Models need to be Read/Write. (The outline highlighter needs read access in order to apply the outline.)
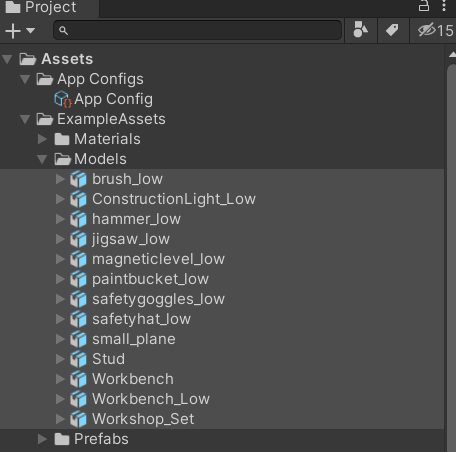
In the Project window, expand Assets → Example Assets → Models
Highlight all the models and in the Inspector check the Read/Write Enabled checkbox
Configuring Existing Prefabs for use with Storyflow
We will use one specific prefab for the next few examples. The same steps can be applied to any existing prefab to make them work with Storyflow.
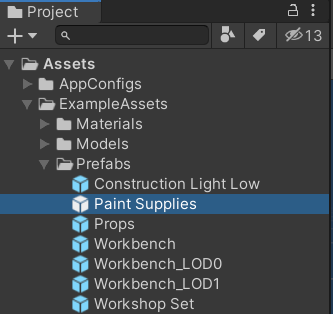
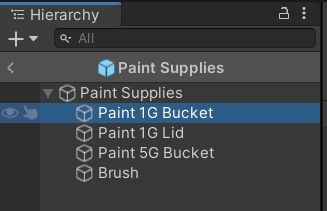
In the Project window, open expand Assets → Example Assets → Prefabs. Open the Paint Supplies prefab. In the Hierarchy select Paint 1G Bucket
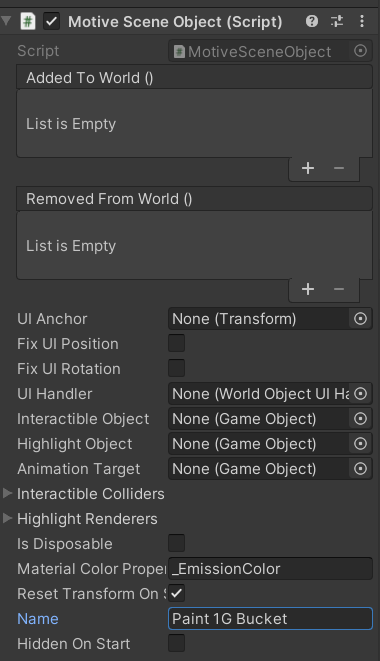
Motive Scene Object Script
The MotiveSceneObject script can be attached to a prefab. It has a name field which is recognized by Storyflow. This will allow the prefab to be included in a Named Object Catalog and used in scripts created with Storyflow.
In this example, we will add the MotiveSceneObject script to the Paint 1G Bucket prefab and give it a name.
In the Inspector, click the Add Component button.
In the search bar, type Motive Scene Object
In that script, find the Name field and give the prefab a name. This exact name is how Storyflow scripts will identify this object.
In Storyflow, create a Named Object Catalog. Create a new item and give it the same name (case sensitive) used in the Motive Scene Object.

You can now create scripts in Storyflow that can use the Paint 1G Bucket prefab in the scene.
Make the Paint Can Grabbable
Right click the paint can.
Navigate through the Motive menu and select “Make Grabbable.”
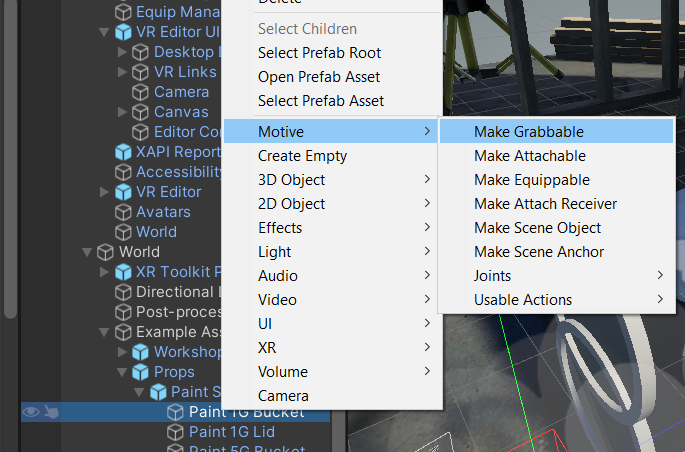
This script allows a prefab to be picked up in VR using the controllers. We will use the Paint 1G Bucket as our example.
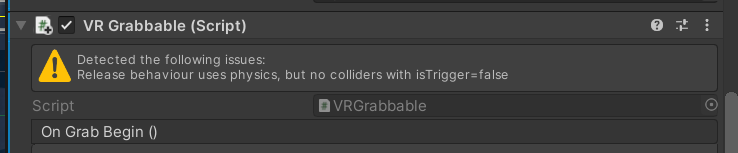
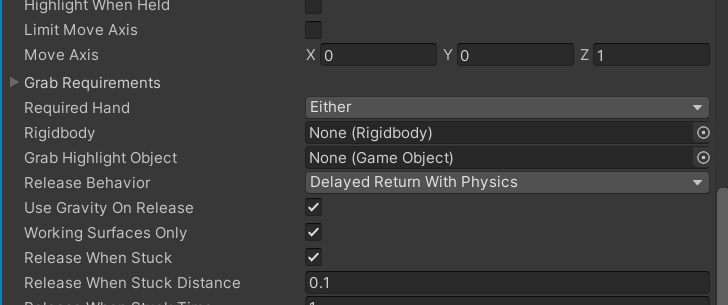
You should now be able to pick up the bucket from a distance or by reaching towards it and grabbing it directly. You will notice that when you drop the bucket, it falls through the floor before returning to its original location. Notice that there is a warning on the VR Grabbable component:
Make sure the Mesh Collider has the following settings:
Convex = True
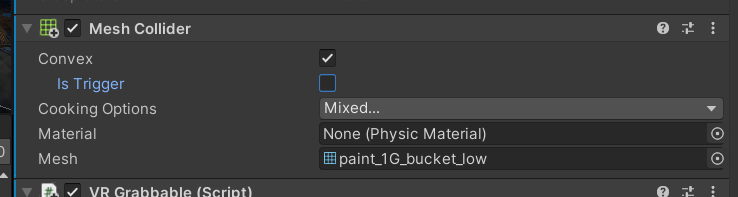
Now when you drop the can it lands on the floor before returning to its original location. This behavior is controlled by the “Release Behavior” setting on the Grabbable currently set to “Delayed Return With Physics”:
At this point, you have:
Configured the scene to connect to the Motive Training Platform.
Configured an object to be interacted with (grabbable).
Nice work!
Next Steps
Provisioning VR Headset with Storyflow
This article describes how to provision your headset with Storyflow.
Locomotion
The SDK includes two ways to let the user move around in the scene. They both allow the user to teleport from place to place. You can learn more about them in this article.
Object Configuration
Follow this workflow when configuring objects in the scene.
As described in the workflow, you’ll use Storyflow scripts to test your configured objects. You will need to provision your headset in order to run the Storyflow Scripts.
In the above example, you made an object grabbable. You can try other settings or dive into VR Grabbable for more information about how to configure Grabbables. The VR Grabbable Recipe has a detailed breakdown of how to configure and test your configuration with a Storyflow script
Generally, there are many ways to configure objects. VR Grabbable is one example. Check Recipes for more ready-to-go recipes to set up items in the scene, or for a deeper dive, start working through Unity Components to learn about many of the other components that are available.
SDK Docs & Support
Our docs for the SDK are online.
Our Support Board is the best and fastest way to get your questions answered.